DIY kids playground project
In 2011 after unsuccessful search for a descent price-worthy playground for my kids, i decided to build my own instead.
")
")
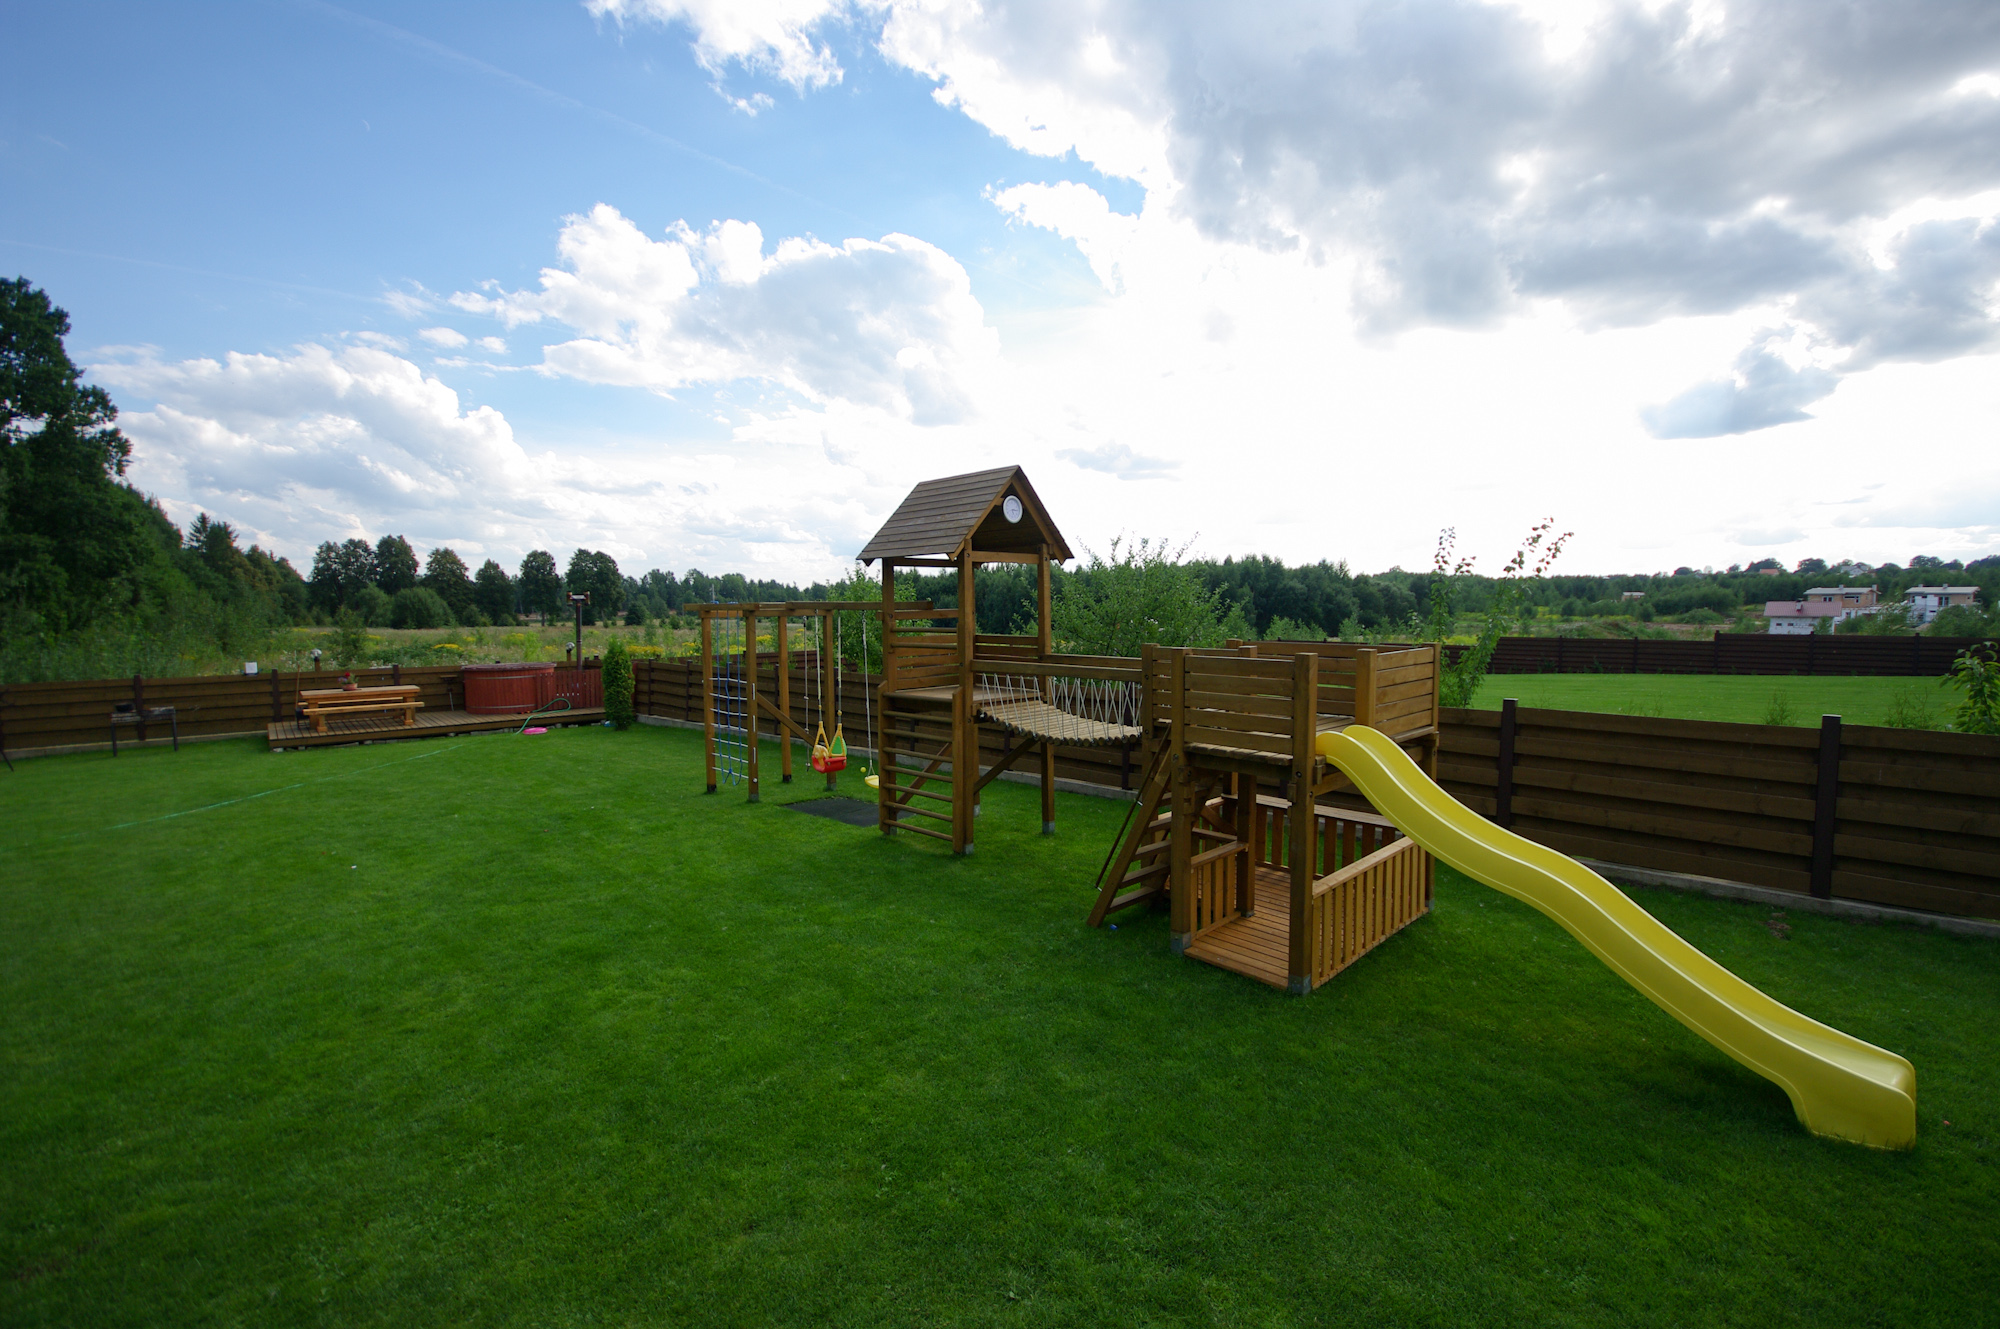
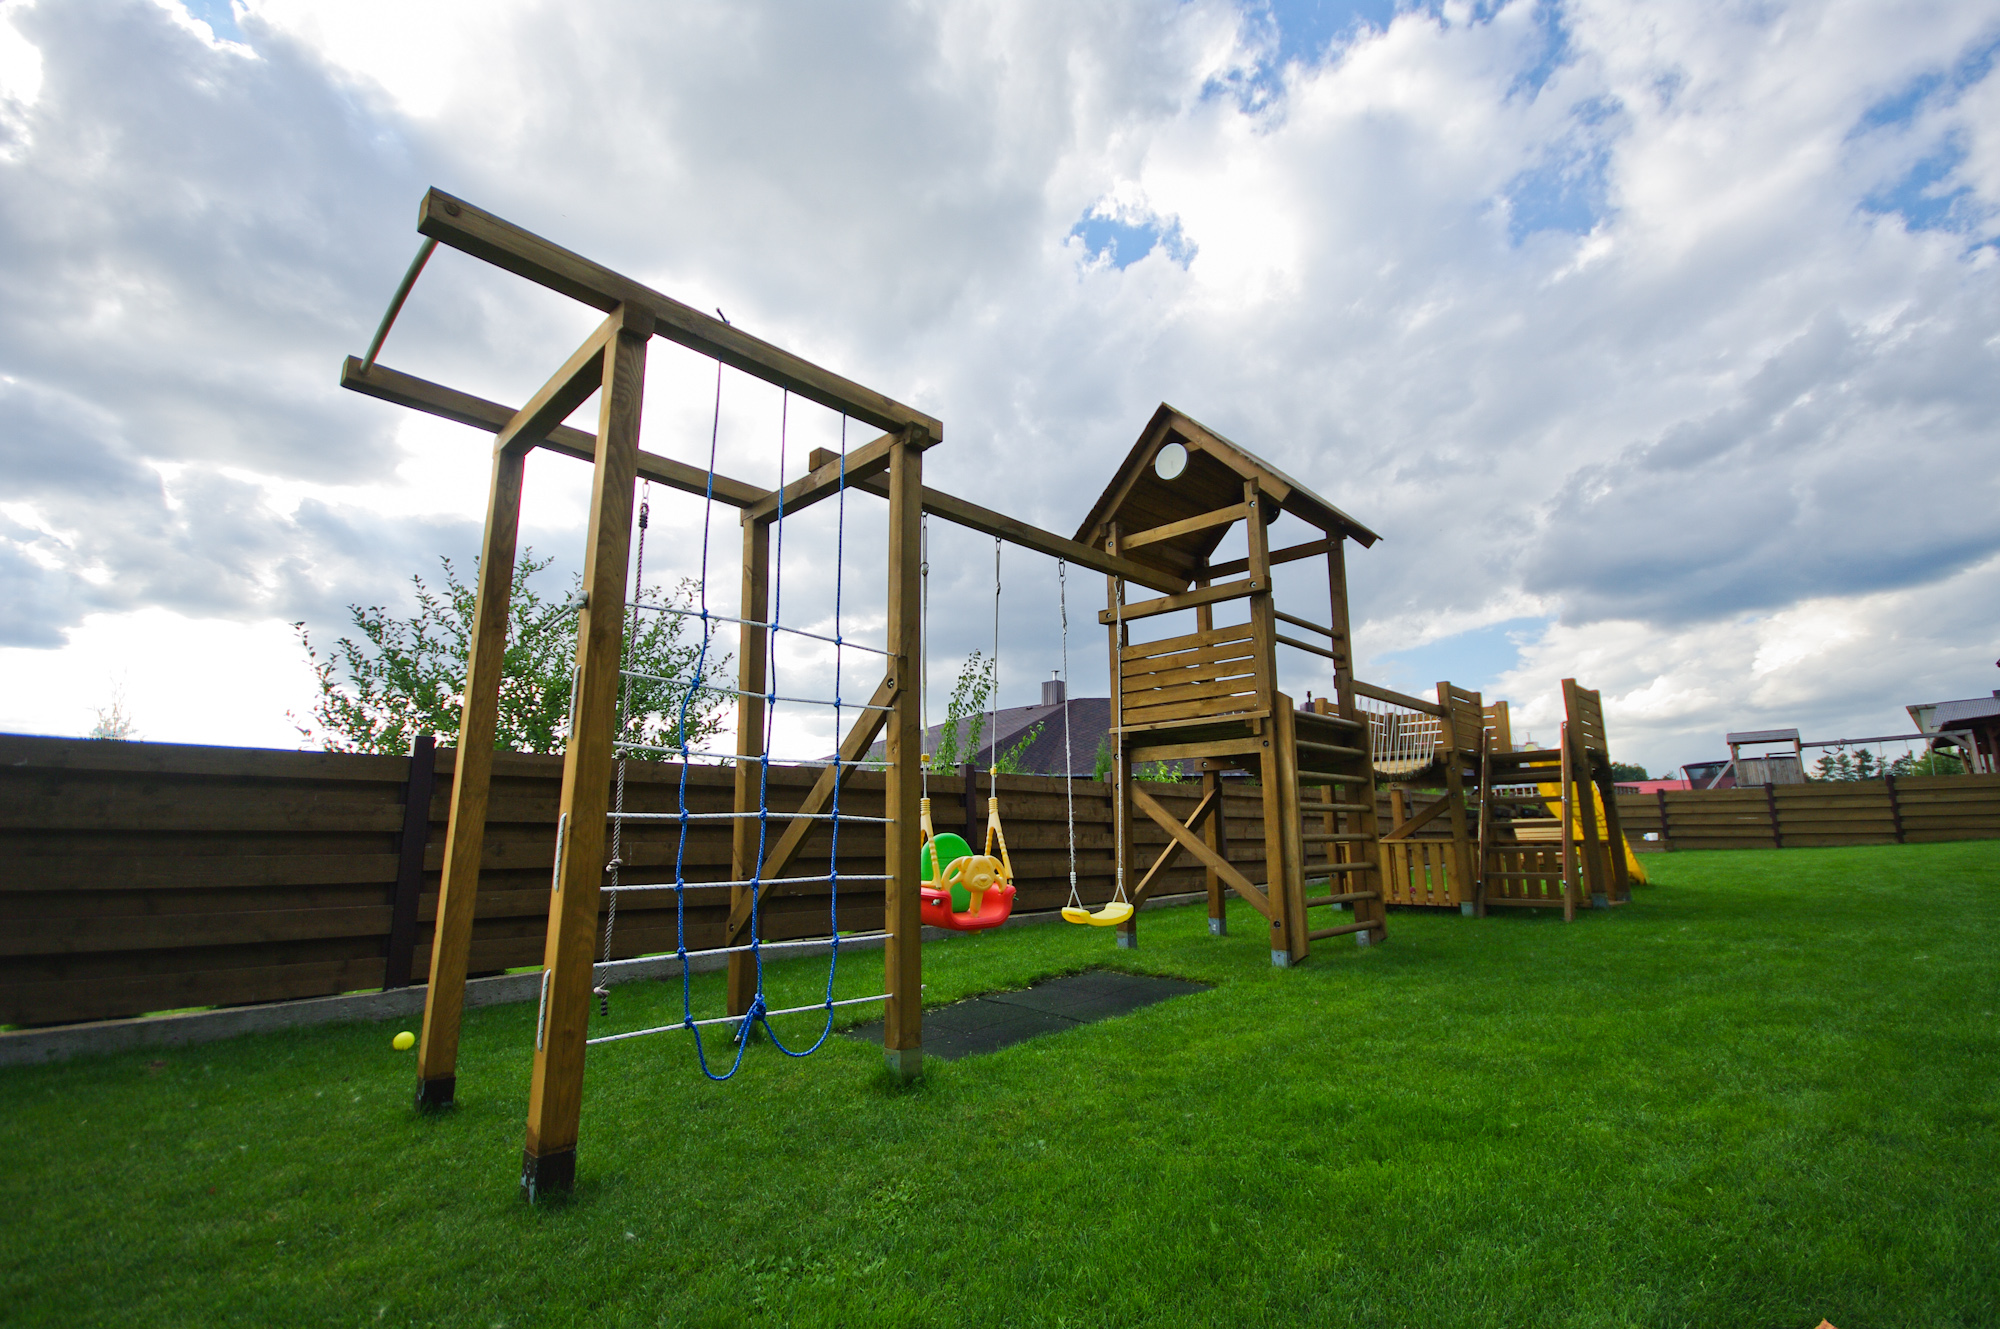
Updated photos of 2013:
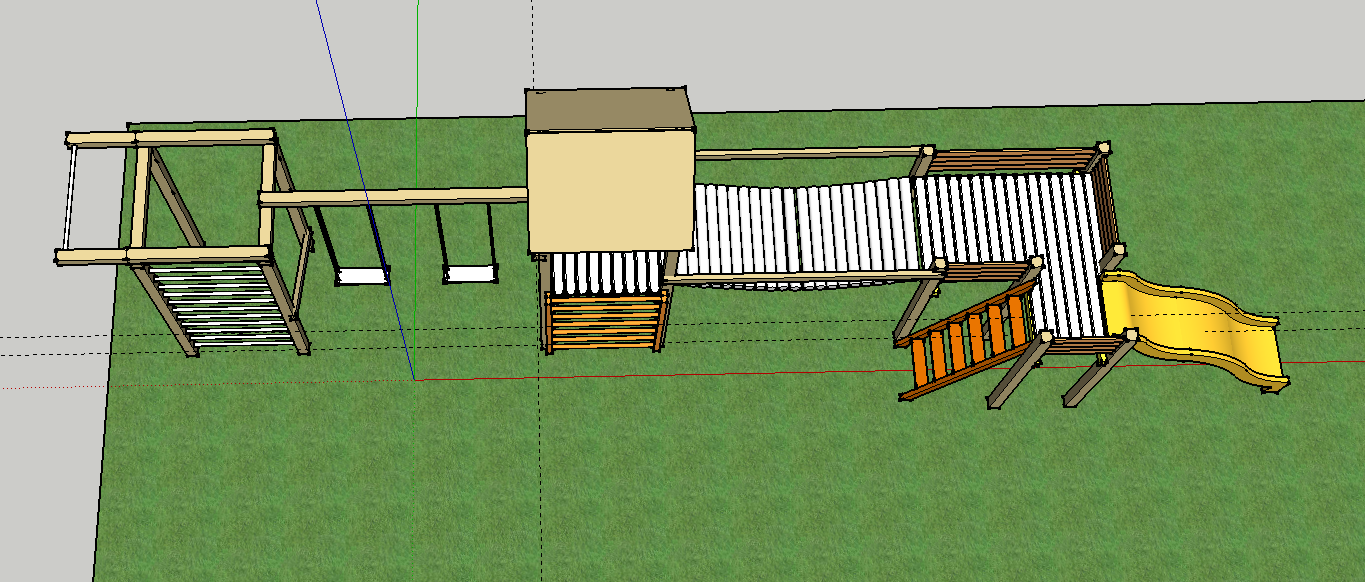
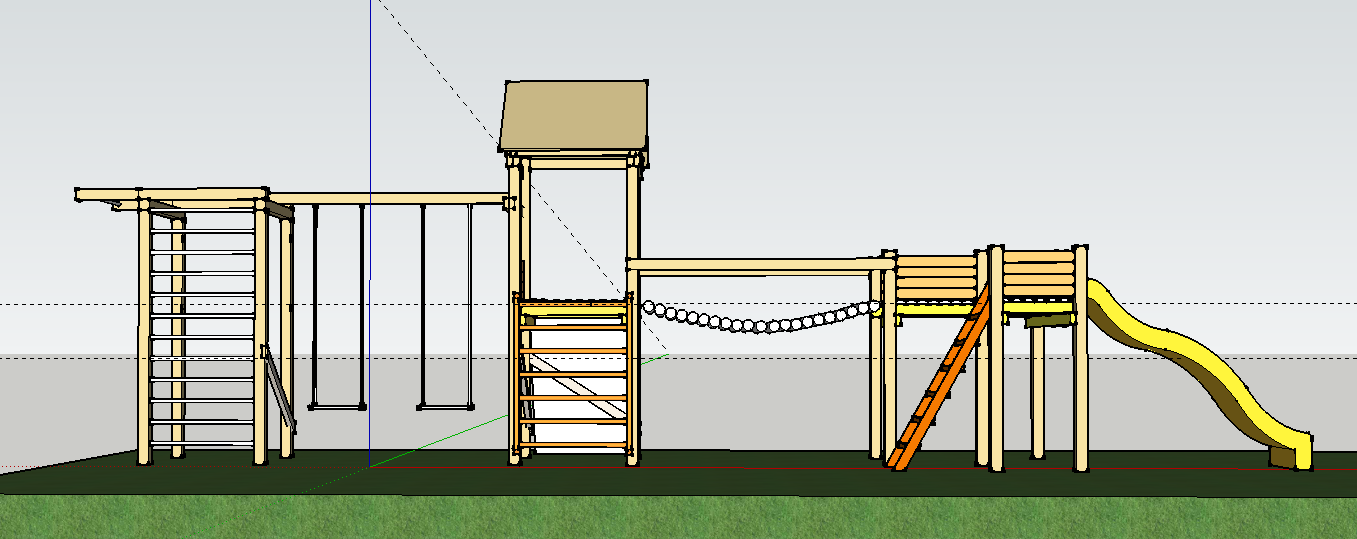
Stage 1. Planning and modeling
SAFETY FIRST! Always think about the safety of those who will enjoy the playground.
Started with hours of bowsing on the internet, skecthing with pencil and paper, then modeling with Google SketchUp. Finally, I ended up with this result:
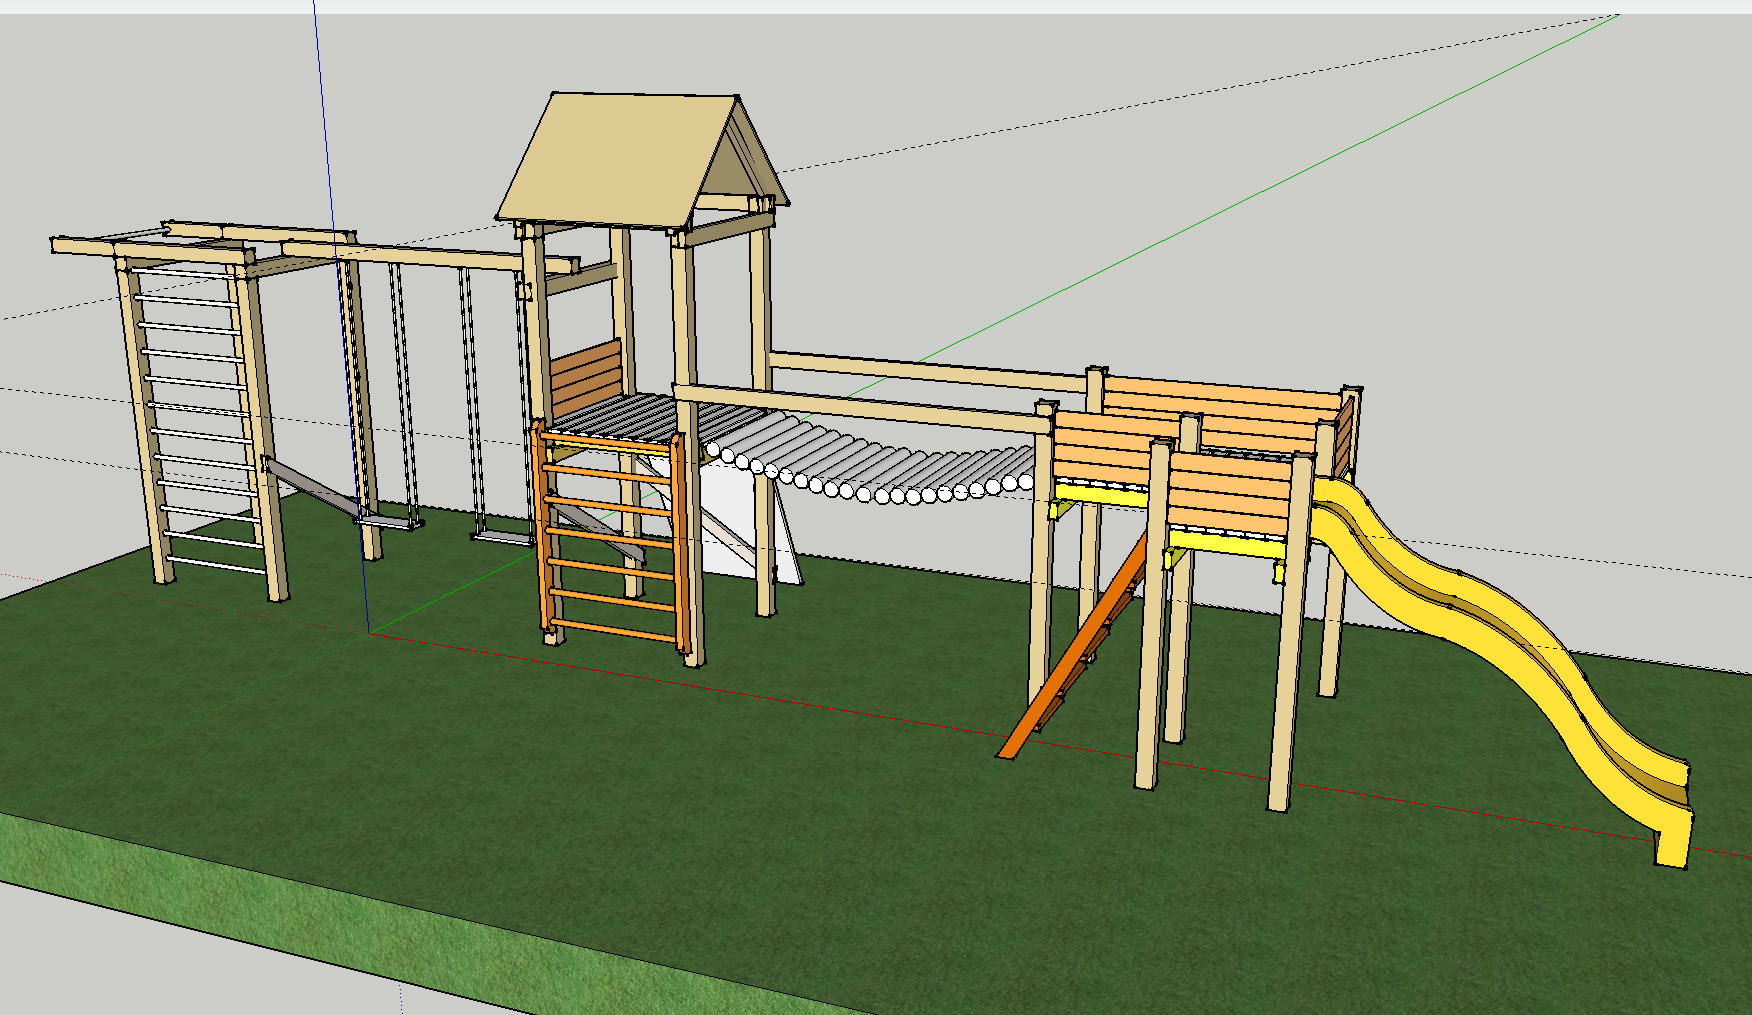


3D modeling is real fun, but you have to keep in mind your carpentry skills and tools you have. Also some basic knowledge of woodworking, theoretical mechanics and physics are needed.
First, i built a scale 1:5 model from 20 x 20 mm sticks to test the strength of the construction.


Whereas there were no detailed plan or blueprint, the scale model revealed all majos faults in the initial design, so it saved me dosens of hours fixing problems on the real product. After my almost-two-year old daughter sat on the model and it didn’t break, i was sure the Big Thing will withstand everyting.
Step 2. Production
None of the timber parts came prefabricated.
Timber used (all bought at local mill):
- 100 x 100 x 6000 mm sawn and planed timber (pine) blanks – used for vertical columns (posts).
- 100 x 50 x 6000 mm sawn and planed timber (pine) blanks – used for diagonal and horizontal structural elements.
- 120 x 40 x 600 mm sawn and planed pine boards – used for the decking.
- 100 x 25 x 600 mm sawn and planed pine boards – used for side walls.
- Some 80 mm diameter turned timber garden fencing pillars – used for the „monkey bridge”
- Some tong-and-groove boards for the tower roof.
Metal parts:
- Metal galvanized bushes to fix a post into the ground.
- Bunch of threaded rods, bolts and washers,
- Some metal cable.
Tools used:
- Handheld electric circular saw
- Couple of electric drills
- Electric router (not essential)
- 10″ miter saw
- Electric Jigsaw
- Electric planer
- Electric angle grinder
- …and bunch of handtools: hammers, screwdrivers, axe, chisel, etc.
First, put all the posts in place:

Marked the places for the posts, then hammered the metal fixings into the ground, then pushed a posts into it and bolted them firmly.

Diagonal boards used to keep the post vertical. Then, using circular saw and an axe, chisel and hammer, i made 30 mm gaps in the posts to join horizontal 50 x 100 mm boards.

All main rimber joints are done using threaded 8 mm rod (somewhere 10 mm) and steel nuts and washers. Used angl grinder to cut the rod.

First, i measured, pre – cut the timber blanks, then clamped them together, drilled through, then hammer the piece of a threaded rod in, put the washers and turned the nuts tight – voila!
At the end of the week i was here (bought the swings at the local store because the kids were anxious to use it):
")
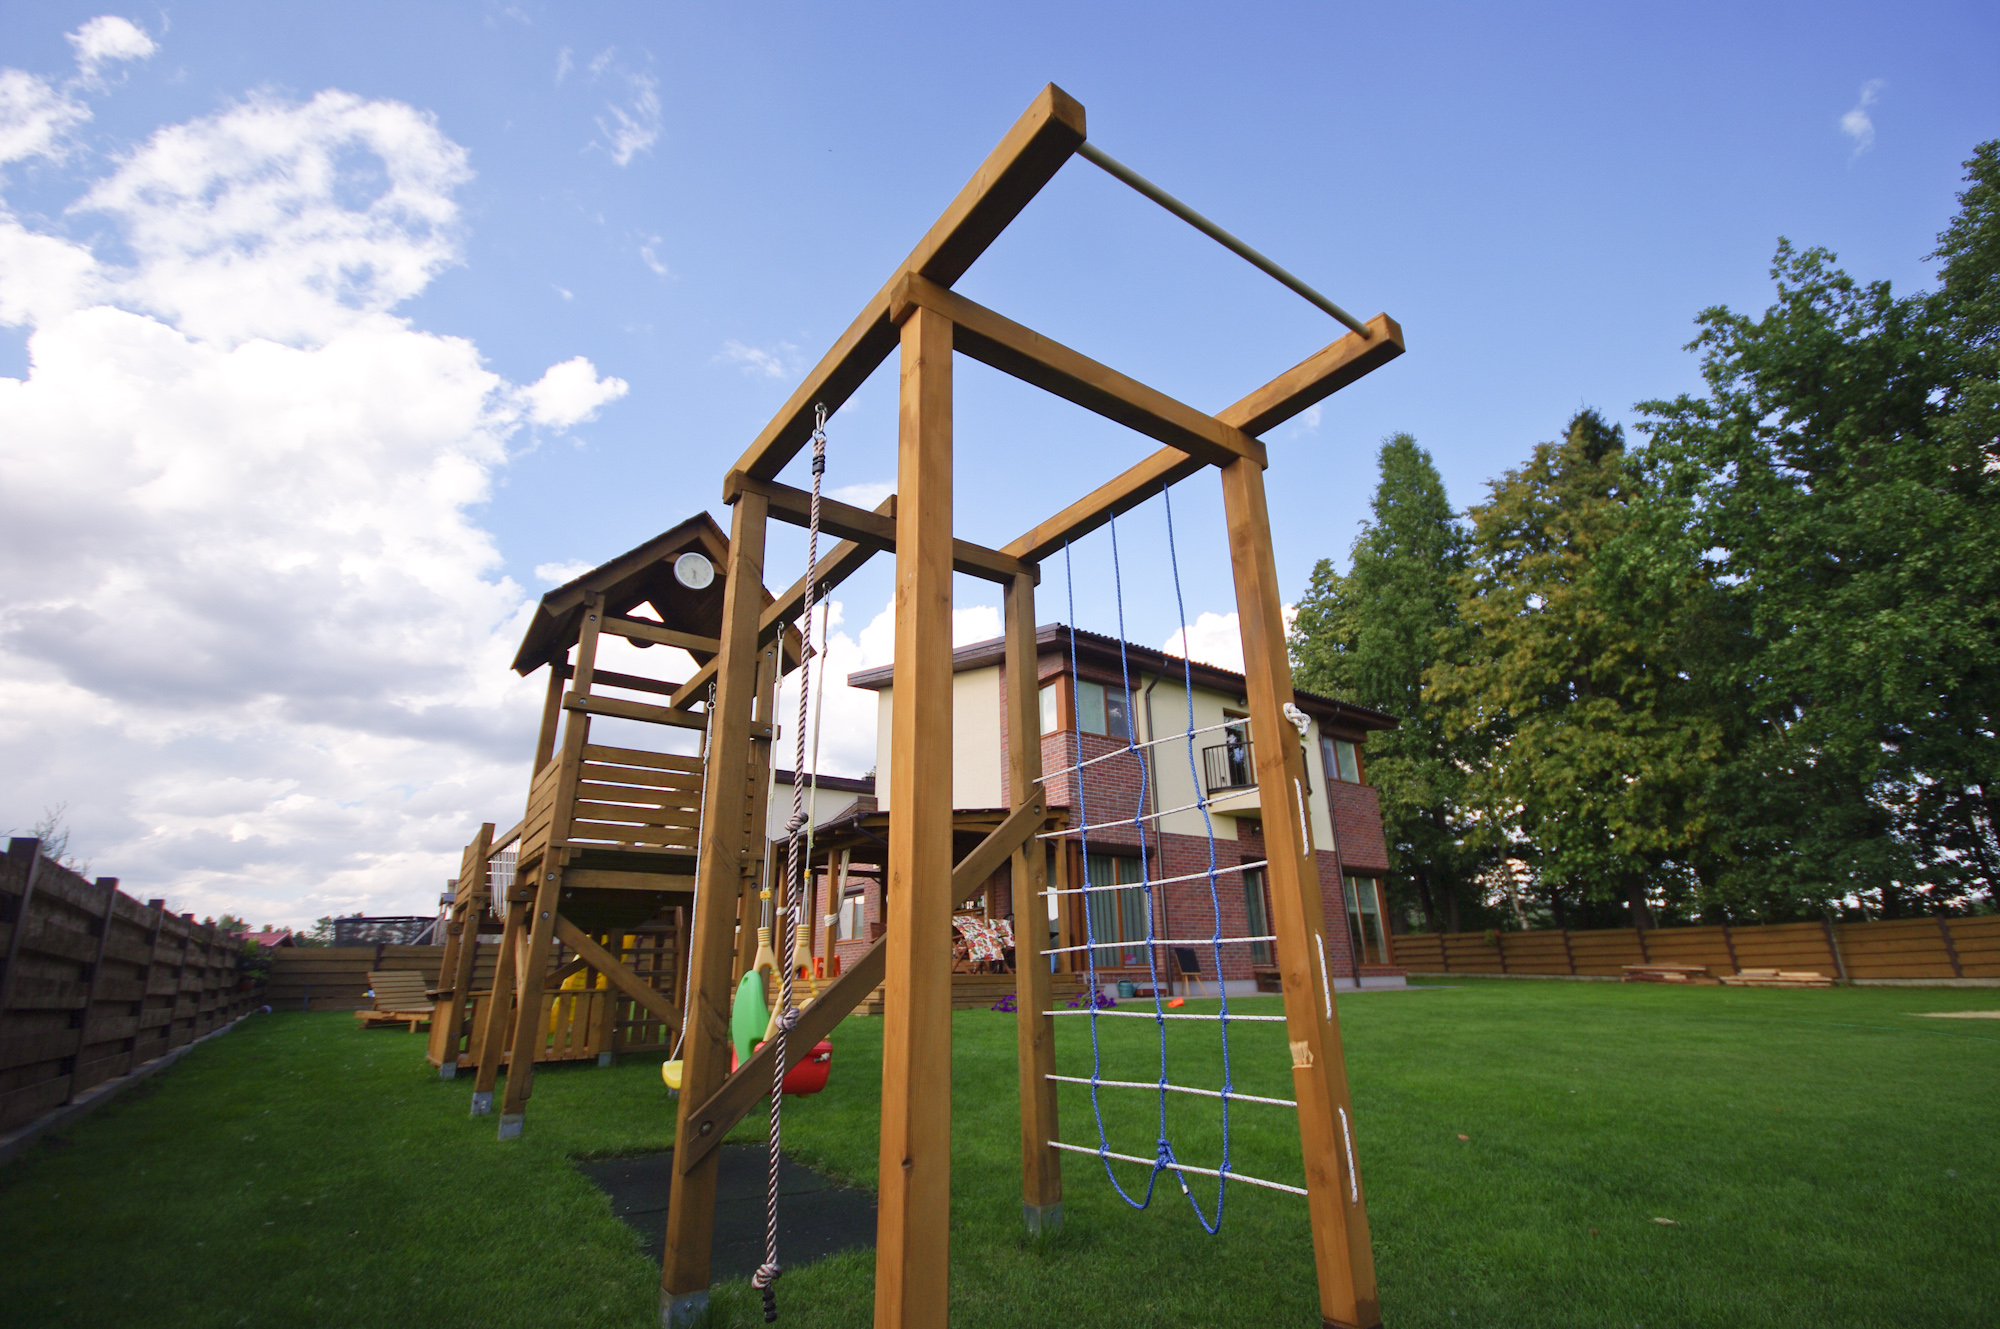
Monkey Bridge
After main frame was complete, i started to work on the so-called „Monkey bridge”


First of all, i bought some turned garden fencing poles at the local garden supply store. They came arrow-shaped on one end, so i had to cut it first. Then i drilled two holes in each of those and strung a 6 mm steel lines through. Then i ancored the lines to the beams fixed between the posts. For convenience, i put the workbench underneath the bridge.
Strong wooden bars above the bridge act as a handrails and supporting bars to counter-force the downward pressure of the bridge.
White rope on the sides plays no supportive role, it is here just for aesthetic purposes and also protect small kids from falling off the bridge.


Stairs, ladders and other bits and pieces


Using hole cutting drill bit and a chisel and a hammer do the rails. Rails are made from 100 x 50 mm blanks. Steps are made from 40 mm diameter turned garden posts.


To calculate proper height of steps on stairs and ladder, i recommend this online calculator.
Bought the slide for about 80 EUR at local supply store.
The overall cost of playground was not calculated, but i think it is less than 750 EUR.
Ready for kids party:

Feel free to contact me for advise…
One thought on “DIY kids playground project”
can you post the Sketchup plan for this structure? I am very interested in building this for my kids. Thanks!
videoreactor